(1).png "PowerHome.com")
A wind turbine is a device that uses wind energy to convert it into electricity. It usually consists of a series of huge wind turbines and generators mounted on supports or towers high above the ground in order to capture a higher velocity and more consistent flow of wind. As the wind blows over the wind turbines, they rotate, converting mechanical energy into electrical energy through a drive train. This conversion process does not involve the burning of any fossil fuels, making wind power a clean, renewable form of energy that is friendly to the environment. A DIY wind turbine is an exciting project that converts natural wind energy into a renewable source of electricity. With simple materials and basic tools, you can create a small but efficient wind turbine that will provide clean energy for your home. This article form PowerHome.com will guide you on how to build your own DIY wind turbine using easily accessible materials and simple steps so you can experience green energy at home.
Basic Knowledge
Wind turbines can be used for projects of all sizes, from a single small wind turbine to a large wind farm. They are widely used in places like power plants, rural areas and cities to provide a steady supply of electricity to the grid. With technological advances and cost reductions, wind power is becoming an important part of the global energy transition, making a significant contribution to reducing greenhouse gas emissions and combating climate change.
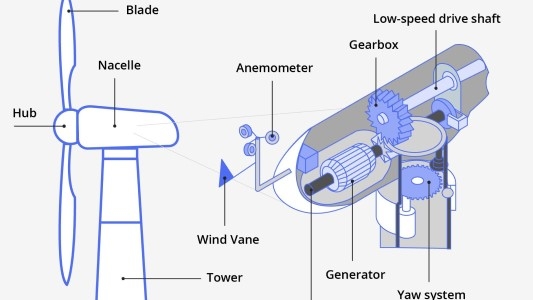
First, we should understand what parts a wind turbine generator is made of. A common horizontal axis wind turbine is made up of four main parts: Tower, nacelle, hub and blades, and looks like a large upright fan standing on a base. Since it's handmade, we can omit most of the equipment in it (e.g. gear box, controller) and keep only the key parts.
Materials List
Many cardboards: The core material. They can be taken from express packaging. They can be freely replaced by other materials such as steel and plastic.
- Scissors: Used to drill holes and cut cardboard.
- Glue: It is used to stick all the parts together.
- DC Motor: Used to generate electricity.
- LED Lights: To test if the generator can produce electricity properly.
- Wires and Soldering Equipment: To connect the LED lights to the motor.
DIY Process
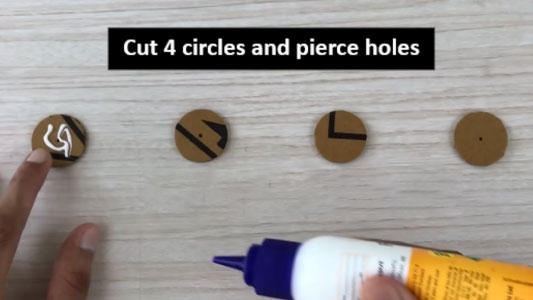
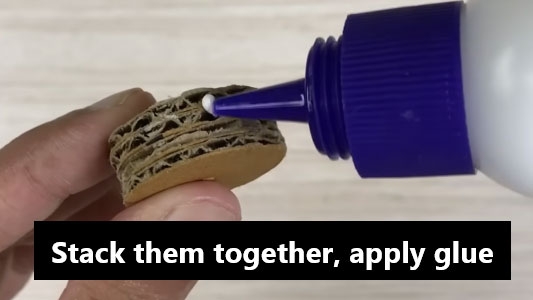
Step 1: Cut 4 circles of the same diameter out of cardboard and pierce holes in the center of the circles. The holes should be just large enough to accommodate the output shaft of DC motor. Apply glue to the surface of each circle and stack them together to create a cylinder.
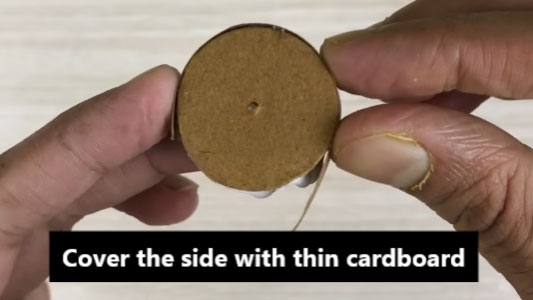
Step 2: Apply glue to the side of the cylinder and cover it with a smooth and thin piece of cardboard. In this way, the hub part is completed.
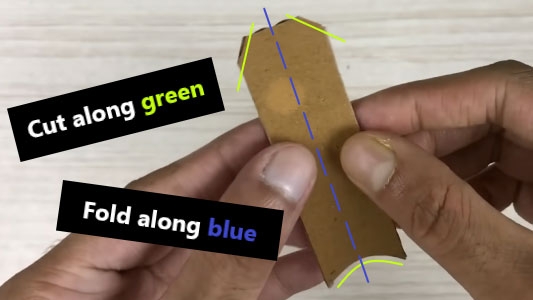
Step 3: Cut 4 rectangles of the same size out of the cardboard and do the following for each piece: cut a curved shape at the bottom and cut off the top two corners. Fold along the center line of the narrow side until a crease appears and then unfold.
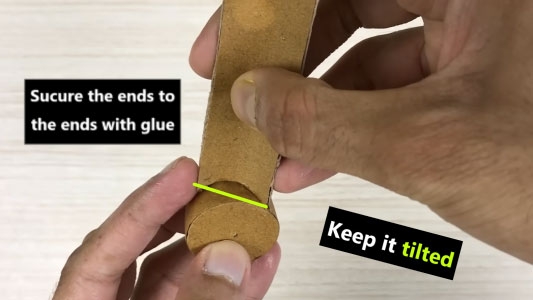
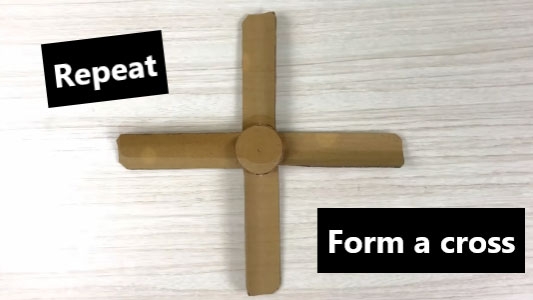
Step 4: Secure the ends of the curved bottom to the ends of the cylinder to form a beveled surface. Make the remaining 3 rectangular pieces of cardboard as you did, so that they take on the shape of a cross on the hub. This step is for making blades.
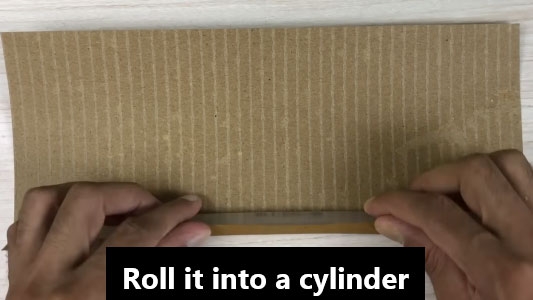
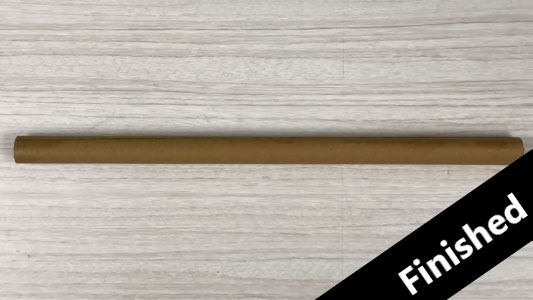
Step 5: Find a large rectangular piece of cardboard and roll it into a cylinder using any props as a support (steel pipe, pen) and fix it with glue. This is for making the tower.
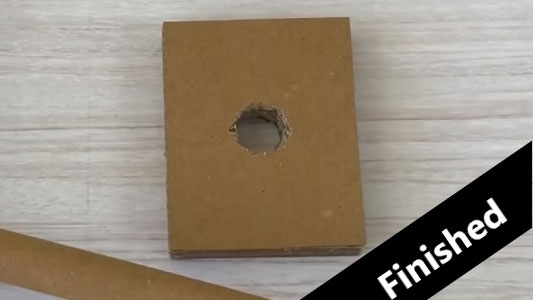
Step 6: Cut out a number of rectangles of the same size, they need to be large enough, and then stack them together to form a rectangle with a certain thickness, punch a hole in the center with the same diameter as the tower, so that the base is completed.
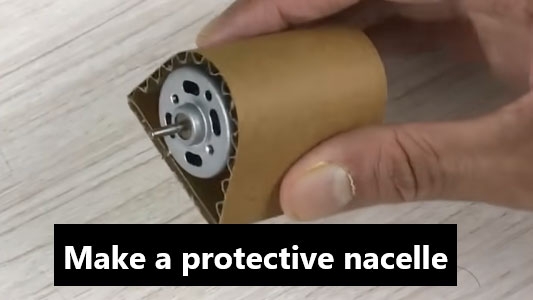
Step 7: Take a piece of cardboard that is similar in length and width to the DC motor and place the motor on it with glue. Cut out a slightly larger piece of cardboard and attach it to the ends of the previous piece to form an arch to protect the motor, creating a simple nacelle.

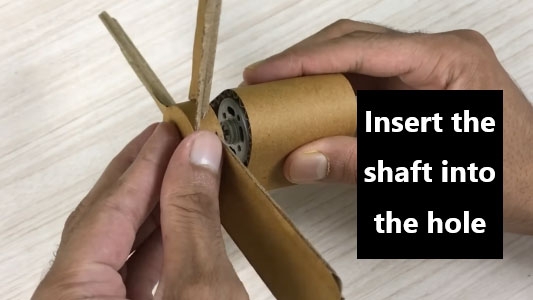
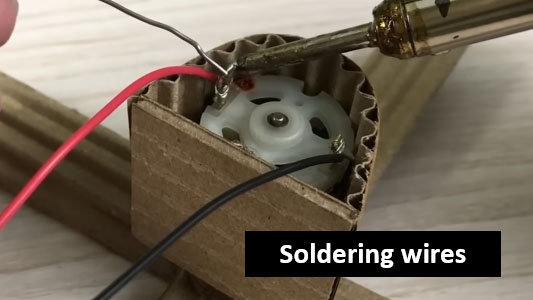
Step 8: Insert the shaft of the motor into the hole in the hub to connect the hub to the nacelle, this completes the assembly of the rotor part of the wind turbine generator. Soldering wires to the motor.
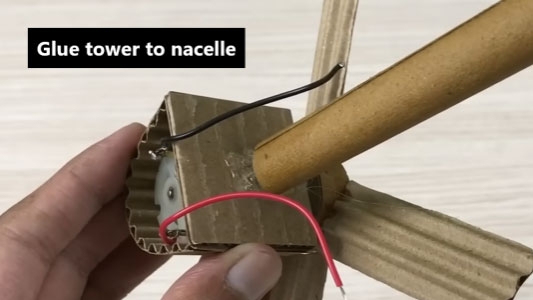
Step 9: Use glue to attach the bottom of the nacelle to the tower, and insert the tower into the base made by step 6.

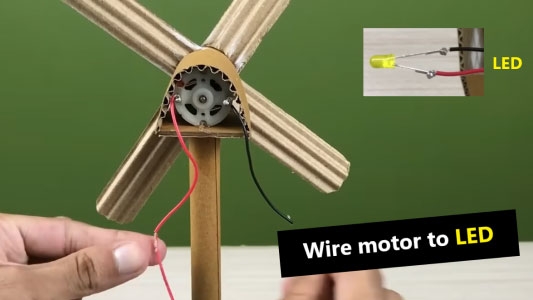
Step 10: Finally, connect the DC motor to the LED light with wires and that’s all you need to do. When the blades rotate in the wind, the wind turbine generates electricity to light up the LED.
In conclusion, diy a horizontal axis wind turbine is relatively simple, though it still requires patience and skill. If the cardboard is replaced with a stronger material, such as steel, the homemade wind turbine can be placed for outdoor use. If you are an environmental enthusiast and have a need to generate electricity, a wind turbine generator would be a good choice.
(1).png)


